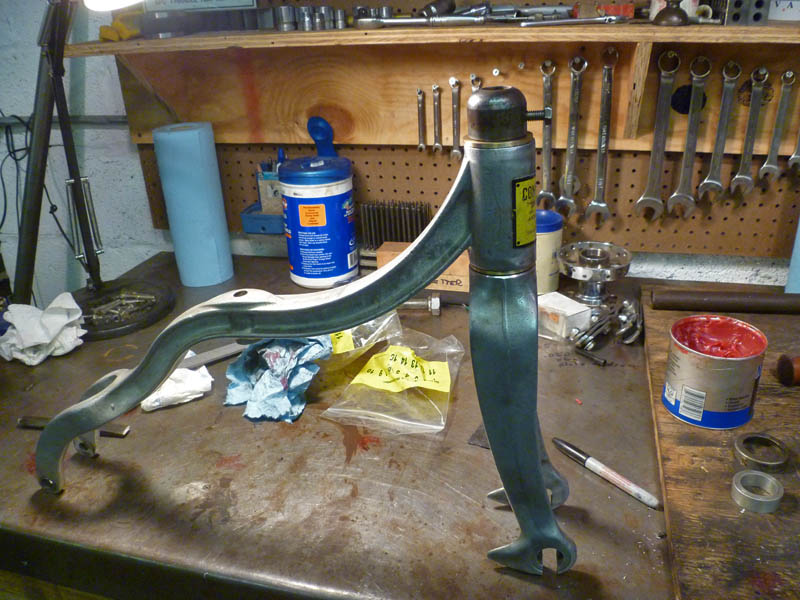
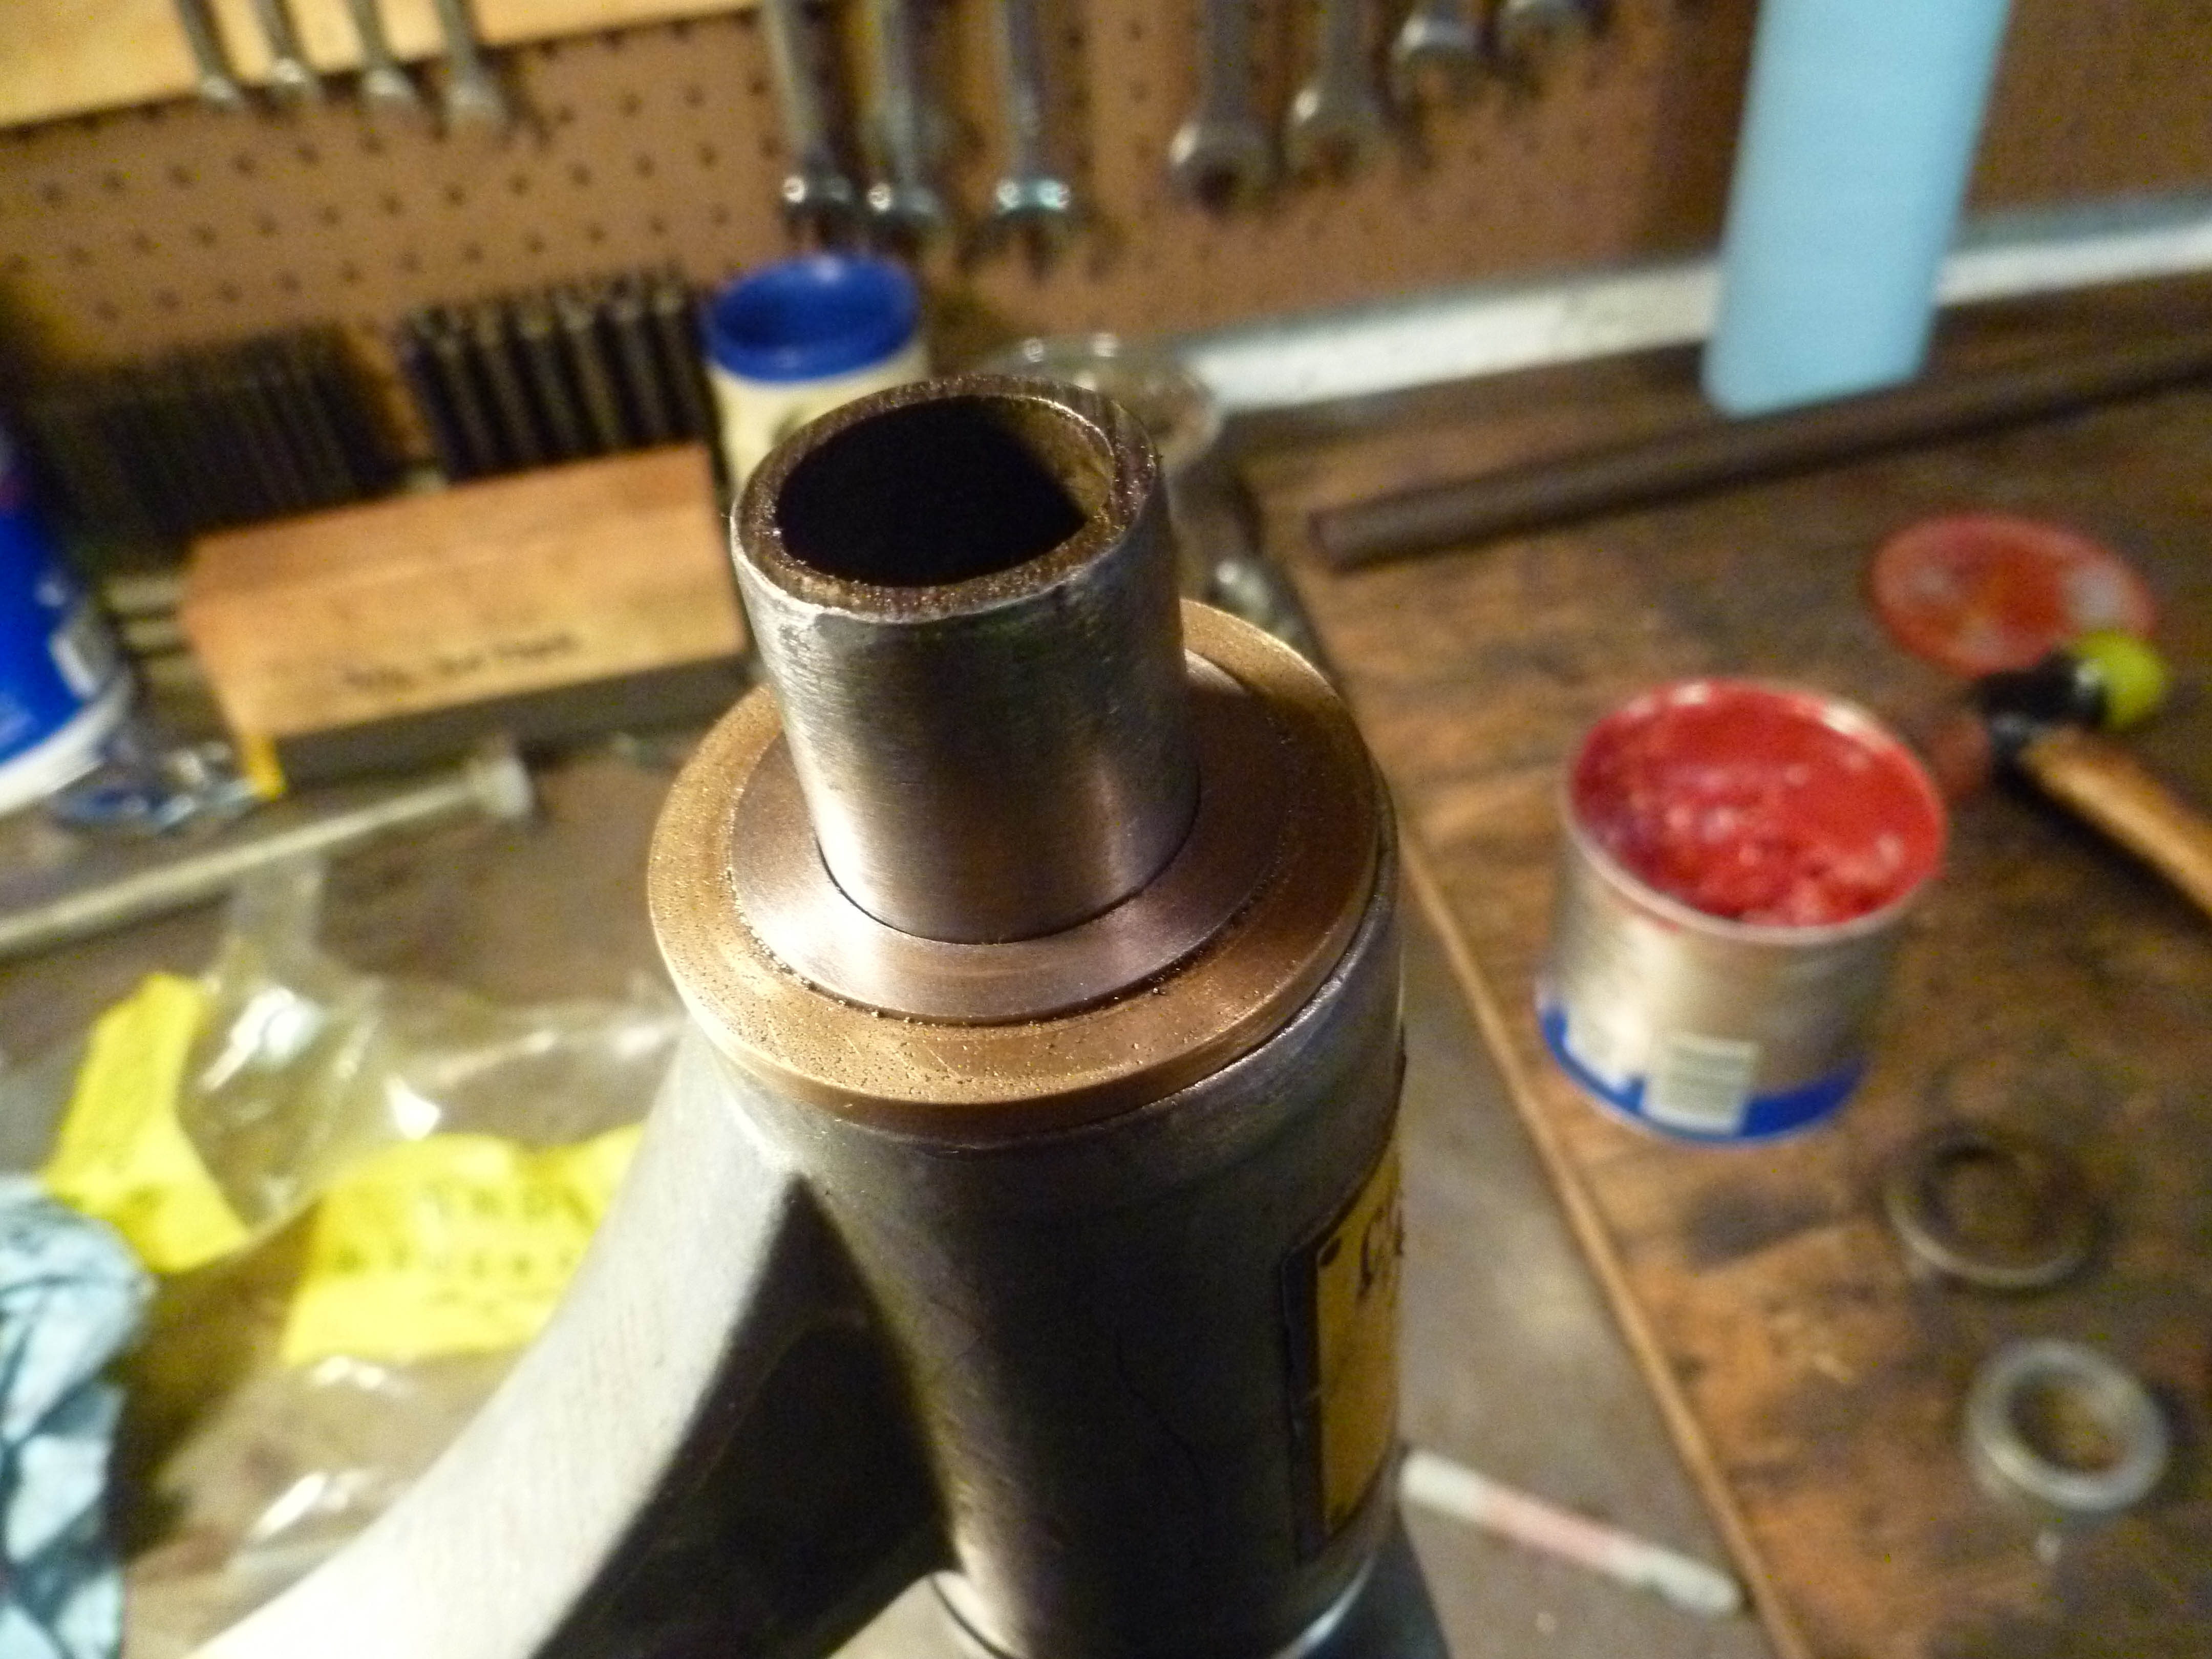
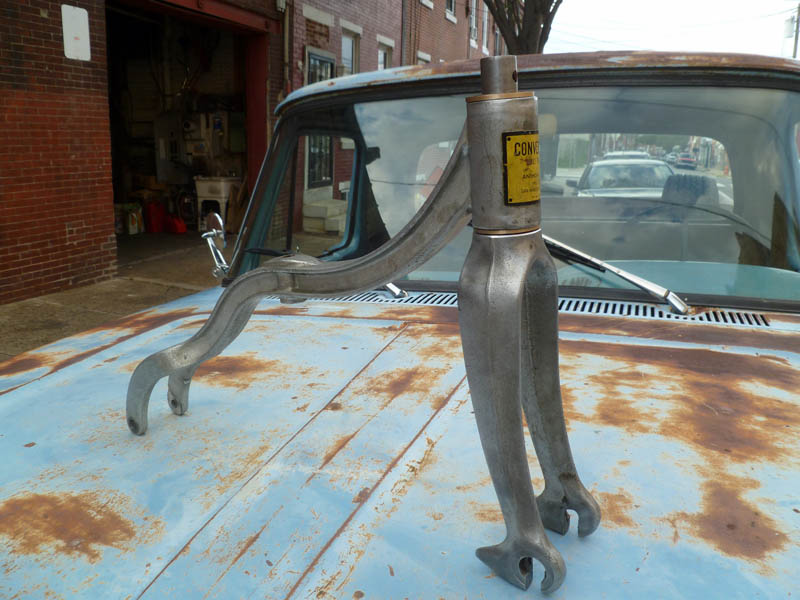
After looking at the mess that was the head and steering parts I spent a day trying to figure out how to fix it. I really didn’t want to make a new stem or weld and reshape the existing one. Research into bearings (thanks, McMaster-Carr for having the best industrial supply business in the world) showed that no available ball bearings would fit the tight dimensions between the fork and frame head tube. I started thinking about how make up some bronze self-lubricating bushings instead. Couldn’t find any sizes that were plug-and-play so I made up a sandwich of two bronze bushings and a steel shim between them, pressed together concentrically. Worked great, if a little too much work for such a simple goal.
Once these bushings were made up, I counterbored one of them for a steel thrust washer so the fork crown (aluminum) wouldn’t get worn away over time. You can’t tell it’s even in there in the pictures. Clean.
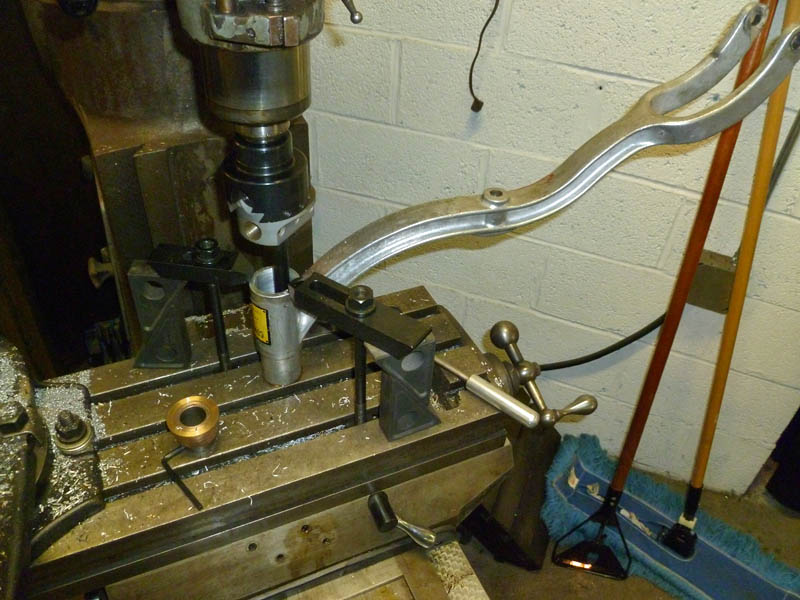
The head tube needed to be bored some for press fit of the bushings. Normally I’d have just turned the bushings down, but the frame had a big seam in the tube that would have prevented a proper fit. I mounted the trike frame to the milling machine table in kind of an oddball fashion, but it worked. I was too lazy to indicate the tube so just eyeballed the setup resulting in the bore being slightly eccentric with the original hole. Whatever. It’s a tricycle, not a track frame. It is silky smooth assembled with zero detectable play.
‘Til next time.
Jason

The top collar needs to be machined down a little as the stack height has increased slightly. Easy enough.


Pingback: Convert-O-Bike Project | GreasyGringo
Thanks Jason. Nice job!
The son of one of my friends just showed up with a 1989 (1/4″ K) Convert-O.
My father worked for Anthony Brothers in the early 70’s so his trike caught my eye.
An extremely loose head crank is all that’s wrong and I can make simple adjustments to bicycles. So I offered to take it home to tighten up. The little tank won’t come apart. Seeing your post on this let’s me know the repair is far beyond my ability :(. I so wanted to help the little tike with his trike.
Pingback: Convert-O-Bike Project (Final) | GreasyGringo
Thanks for the compliment. It was a fun project.
Yes, this one was real bear to get apart.
I finished it over the weekend. My son loves it.
Last installment here:
http://www.greasygringo.com/2012/11/convert-o-bike-project-final/
Jason
Jason – i ‘ve just pulled my son’s 20 year old convert – o – bike out of storage with hopes of bringing it back to life. How do you recommend cleaning up what is now dark spotted aluminum. the handle bars are now also heavily rusted and may need to be replaced unless i can work the rust off here as well. Love the bike,
Michael
Michael,
The aluminum cleans up VERY easily. Get some 000 grade steel wool and a jar of Mother’s aluminum polish. You work it in with the steel wool and buff it with a rag. Takes a little elbow grease, but less than you might think. Don’t think it’s as hard as, say, stripping woodwork. Not even close. Rusted bars can be cleaned up and painted. That’s why mine are painted. You could have them sandbloased first if you really want them to look nice. You could also take them to a chrome plating shop if you’re that into it, but it might cost $100 to get them done.
Jason
Much appreciated. Thanks
Jason thank you for posting all your project steps. Awesome! However, I just picked up a trike. Any tips on how to remove the collar from the fork? The bearings are gone. Thanks.
Good Morning Jason. I thought I was a rare breed but you have me beat. I came across your 2012 Convert-O Bike restoration project. I am almost 20 years retired and live in Toronto Canada. I happen to come across a vintage 1976 Convert-O Bike. Not sure how it ended up in Canada. This was several years ago. I discovered it at the curbside for the trashman. I could not just leave it there. As you agree for a tricycle it was a quality “Built to Last” piece. It sat in my shop until recently. Not sure why I started the project but I am in the process of restoring/improving the bike. Your detailed process has almost mirrored my efforts. I lack the machine shop but did manage to hone and press bronze bearings into the crown but used a fabricated nylon thrust washer where the forks make contact with the crown. I beat you on the price for the identical 6 sealed bearings that were tough enough to find. I got all 6 for $30 Canadian. It is for the most part ready to assemble other than a bit of aluminum TIG build up required where the rear step plate/axle makes contact with the frame.
I thoroughly enjoyed your documentation and applaud your mechanical enthusiasm. I have worked through many motorcycle and auto projects over the years and have several in the works. Unfortunately some of them will outlive me but I keep trying. Maybe my son will pick up where I left off.
Cheers, Be well.